• Home
  • Buy
    • Quarterly Craft Kits
    • Limited edition pendant lights
    • Tools and supplies
    • Books
  • Blog
    • DIY projects
    • Announcements
    • Buzz
    • Out and about
  • About
    • What’s Relevé Design?
    • What’s upcycling?
    • Why do I upcycle?
    • Who’s talking about us?
  • Contact
    • Write to us
    • Join our mailing list
  • Press resources
  • The Quarterly Club

HOW TO 3 easy stars

Posted by Bao   -   Monday, June 4th, 2012   -   DIY projects

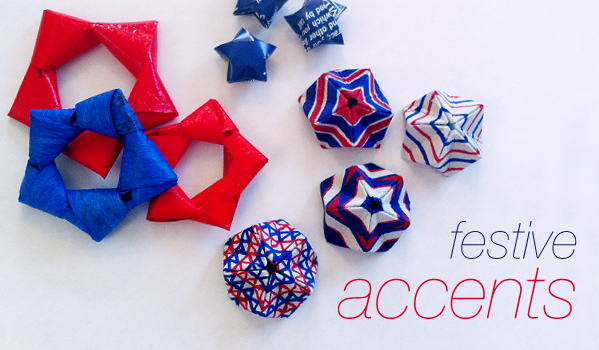
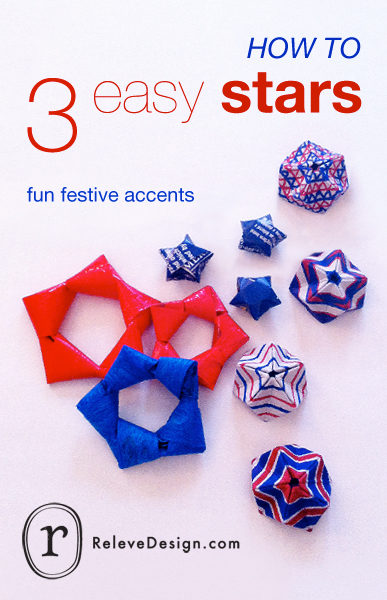
If you’re “starstuck” this July 4th, try out these three fast and easy ways to create stars. I’d use them in a table setting, to accent a Independence Day wreath, or as a fun holiday kids’ craft activity.

Of course these projects can work all year round. Just change up the colors. How would you use them?


Toilet paper tube star

  1. Draw a pattern on the paper tube.
  2. Cut the tube into four even lengths.
  3. Make five evenly spaced creases to make the circular tube into a pentagon.
  4. Fold all adjacent sides together to make the pentagon into a star.
  5. Make a two diagonal folds between each of the initial creases.
  6. Pinch the top and bottom sides together between each of the initial creases. This results in ten indents.
  7. Put a glue into the five indents on side.
  8. Place the tube on a flat surface with the glue side up.
  9. Push the five points to the center to glue the indents together.


Plastic bag star

  1. Fuse a plastic bag. If you need instructions for fusing plastic, check out my tutorial.
  2. Cut a 3/4″ wide strip of fused plastic to about 23″ in length.
  3. Tie an overhand knot, keeping the tail end at least 1 1/2″ long. Don’t tighten the knot completely. If you need instructions for tying an overhand knot, check out my tutorial.
  4. Tie three more overhand knots.
  5. Insert the standing end into the first knot, but leave about 3/4″ out of the knot.
  6. Loop the working end up, behind, and then through the center of the star.
  7. Complete the final knot.
  8. Cut the working end to about 1 1/2″.
  9. Fold the end to create a point.
  10. Insert the point into the first knot to secure working end and finishing the star. To better secure the working end, use a glue gun to apply a very small amount of the hot glue to the point before tucking.


Puffy magazine star

  1. Cut a 3/4″ wide strip from the magazine.
  2. Tie an overhand knot, keeping the side of the paper that you want to be shown on the inside of the knot. If you need instructions for tying an overhand knot, check out my tutorial.
  3. Make the tail end as short as possible. Don’t tighten the knot, and don’t make any creases. The knot should look like a pentagon with a very short tail end and a long working end.
  4. Wrap the working end around the pentagon, by folding the working end over and parallel to the adjacent side.
  5. Repeat step four until the working end it too short to wrap.
  6. Tuck the working end into the middle of the pentagon. If the working end is too short to stay put, apply glue to the underside of the working end before tucking.
  7. Push the center of all five edges inwards with your fingertips to create the points of the star.

Related Posts Plugin for WordPress, Blogger...Pin It

Share this post:

  • Pin It
  • Digg
  • Share on Tumblr
  • Email

No comments yet.

Leave a Reply

Click here to cancel reply.

Subscribe to our blog! Enter your email to get notifications of new posts by email.

Recent Posts

  • Quarterly Craft Kit — revamped cabinet knob jar
  • Top 10 picks: The Armory Show 2013
  • HOW TO long stemmed paper roses

RSS Feed RSS - Posts

Show & tell

Make any of the projects? Create your own art and design inspired project? Discard anything regularly you'd love to see upcycled?

I'd love to know what you're up to!
Write to me. >> Share your pictures. >>

UPCOMING HOW TOs

Picture hanging with wire pant hangers
Giant origami accessories
Scalloped junkmail & magazine vase

See the entire list
and vote for projects you'd like to see next >>

Relevé Design on Pinterest

  • HOW TO dinosaur tail

  • HOW TO French fold fabric ball

  • HOW TO fabric scrap ball

  • Follow Me on Pinterest
find Relevé Design on Facebook Follow Releve_Design on Twitter Follow Me on Pinterest

Fridays 8/7c on ABC
As seen on

Copyright © 2012 - Relevé Design - All Rights Reserved

loading Cancel
Post was not sent - check your email addresses!
Email check failed, please try again
Sorry, your blog cannot share posts by email.