First, I need to introduce you to two uber creative people. Andrew Wagner stands tall in the world of DIY and crafting as the current director of Krrb, founding editor-in-chief of Dwell, and former head honcho for American Craft magazine and ReadyMade. Jen Turner is an award-winning architect and designer who’s projects have graced the cover of ReadyMade and regularly contributes to Dwell and Lucky. With such an unreal track record you know when they team up they’ll develop something eye-popping!
Andrew chronicles their latest team-up in his New York Times column “What You Make of It.” Inspired by the The Aldrich Contemporary Art Museum’s show “Found” they designed a Noguchi style pendant lamp from bicycle rims. You can make your own by following their tutorial on The New York Times website.
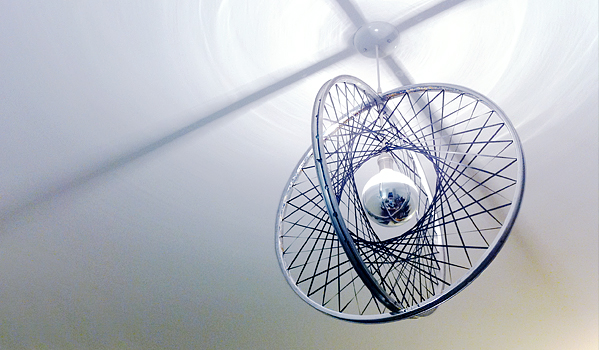
The dynamic duo led a “Trash to Treasure” workshop, and I was fortunate enough to be invited to learn firsthand.Their bicycle rim pendant light is so versatile I couldn’t help but do my own take on it. I’m naming my rendition the “Boole” pendant lamp after the creator of string geometry, Mary Boole. My version generally follows Andrew and Jen’s tutorial with a few important modifications.
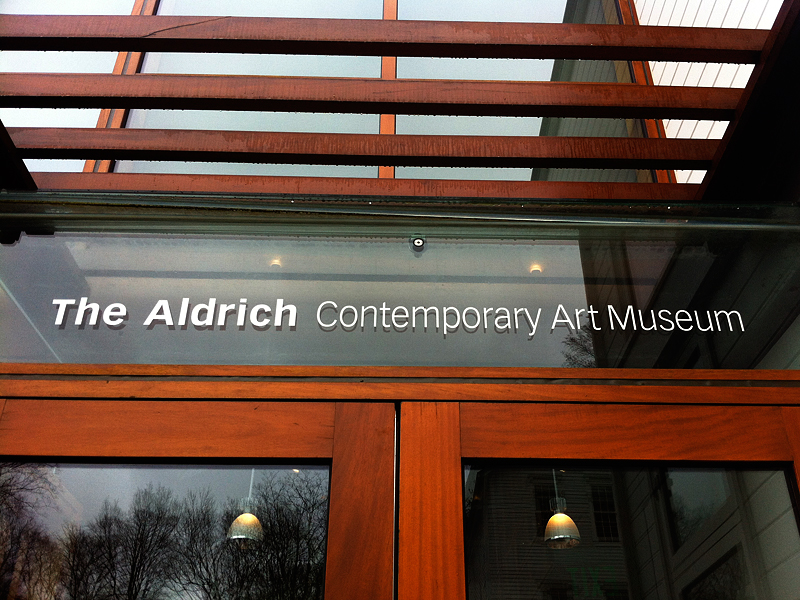

The Aldrich Contemporary Art Museum hosted the event in conjunction with their show “Found”, which was all about repurposing and salvaged materials. One of my favorite pieces is James Grashow’s Corrugated Fountain, a meticulous and gigantic sculpture made entirely of cardboard.
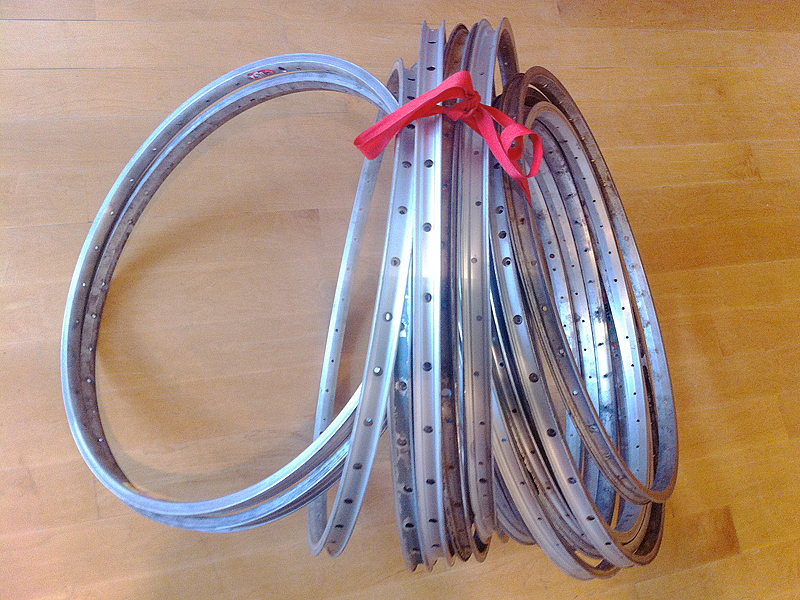
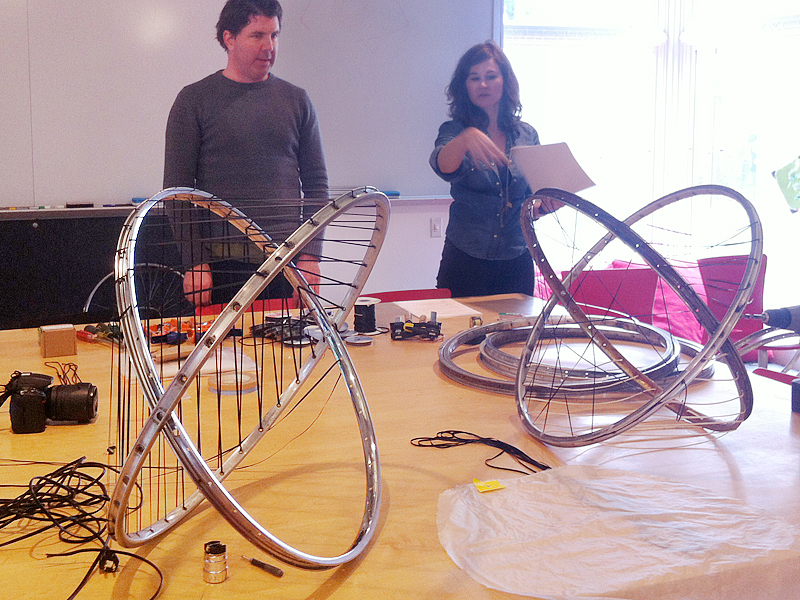
Bicycle rims come in tons of different sizes. Andrew had to collect a bunch. He personally removed the spokes from all of them before the workshop. It’s the most difficult part of the project. Thanks, Andrew! He and Jen explain how the pendant lights could be customized just by stringing the rims with different patterns.
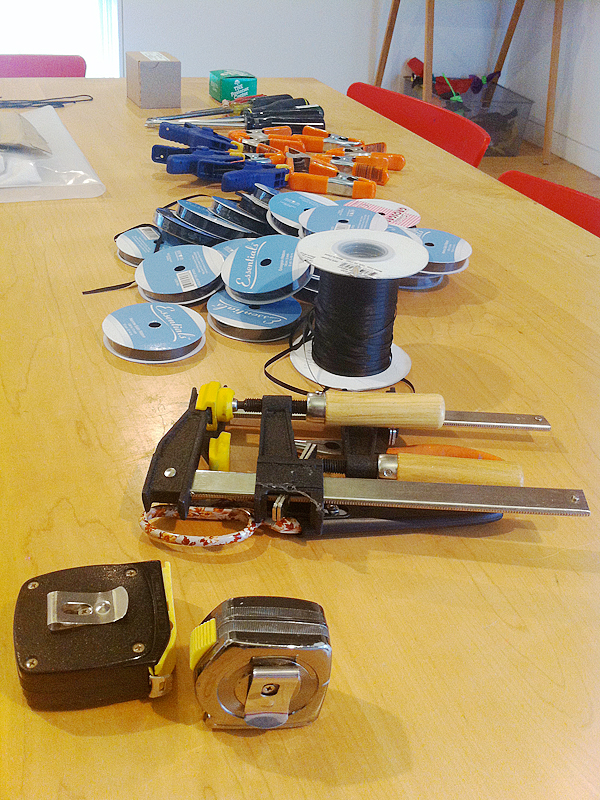
Besides two bicycle rims, tools and materials include a pendant light kit, cord grip, screw, washers, nut, about a yard of ripstop nylon fabric, ribbon, one light bulb, clamps, screw driver, tailor’s chalk, binder clips, and double sided tape. I made a few modifications so my materials list is a little different. I’ll get to that later in this post.
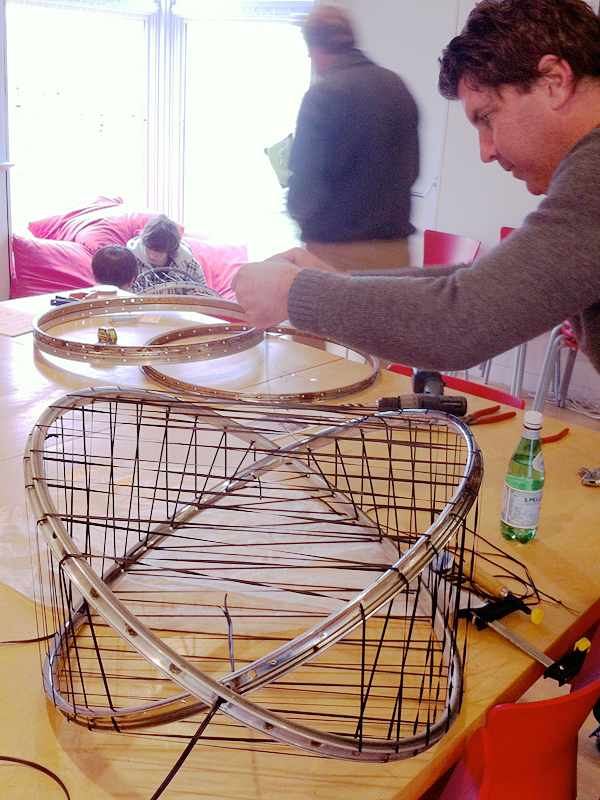
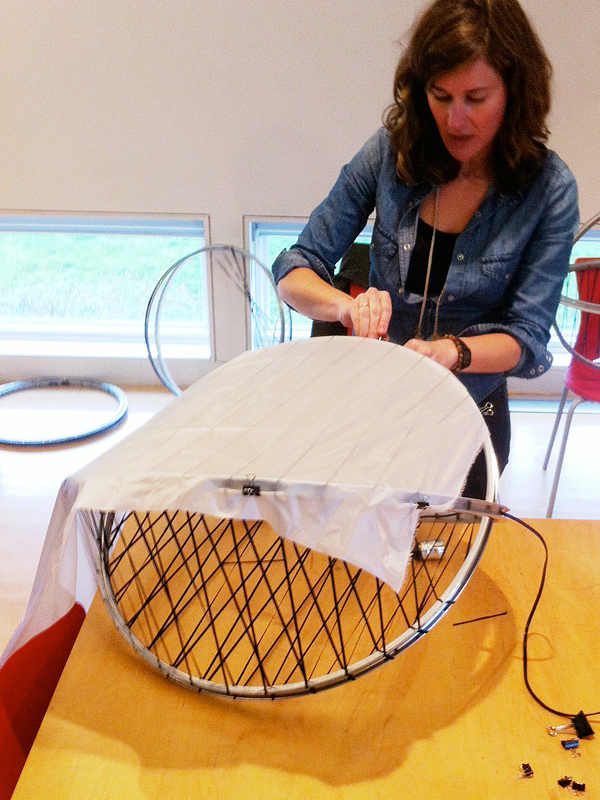
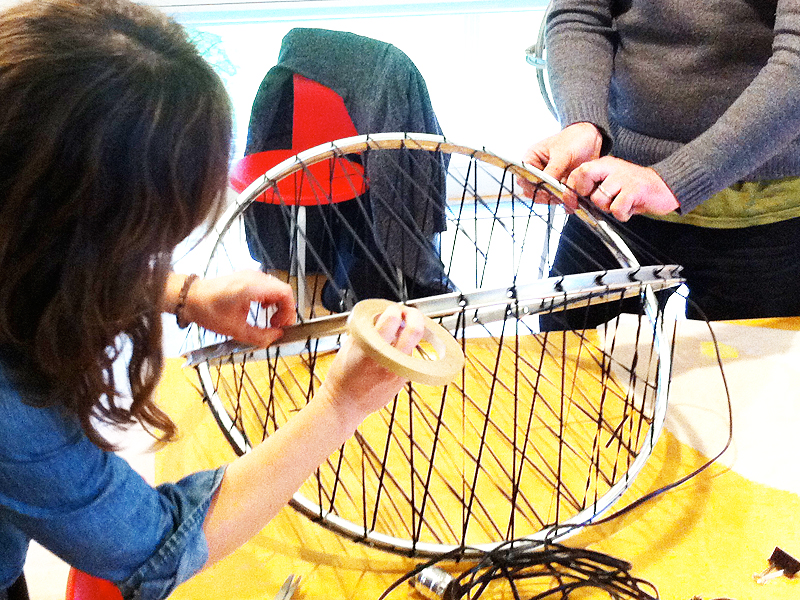
Andrew demonstrates how to string the rims together in a lateral pattern to mimic the bamboo ribbing of Noguchi’s Akari lights. The light doesn’t have to be perfectly spherical. Andrew slightly flattenes the rims together to create a boxier shape. Jen uses the binder clips to position a sheet of fabric before tracing the shape of the light onto the fabric. She then cuts the fabric to size.
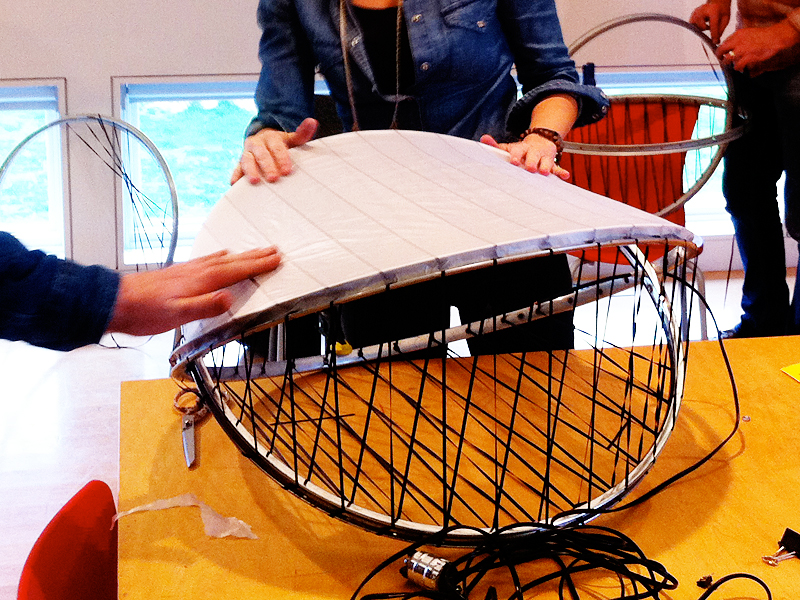
Jen and Andrew line the outside of the bicycle rims with double sided tape, before laying the nylon fabric on the light and adhering it to the rims. Just finish the four sides with fabric and tape, install the wiring, and you’re done!
For my “Boole” version, I went about things differently. I decided not to cover my light with fabric, because I wanted to showcase the intersecting string patterns.
Supplies
You won’t need fabric, tape, binder clips, or tailor’s chalk. You will need a 1 1/4″ long lamp nipple with 1/8 ips threading, a 1″ long coupling with 1/8 ips threading, a 1/8 ips lamp nut, two 1/8 ips lock washers, and a 1/8 ips strain relief cord grip. You can get lamp parts online or at your local lighting store. You’ll also need a drill with a variety of drill bits.
How-to
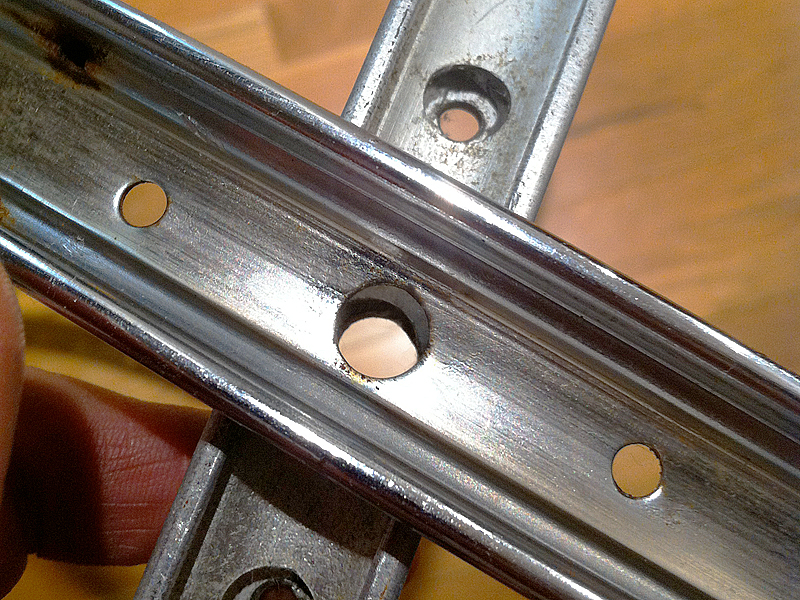
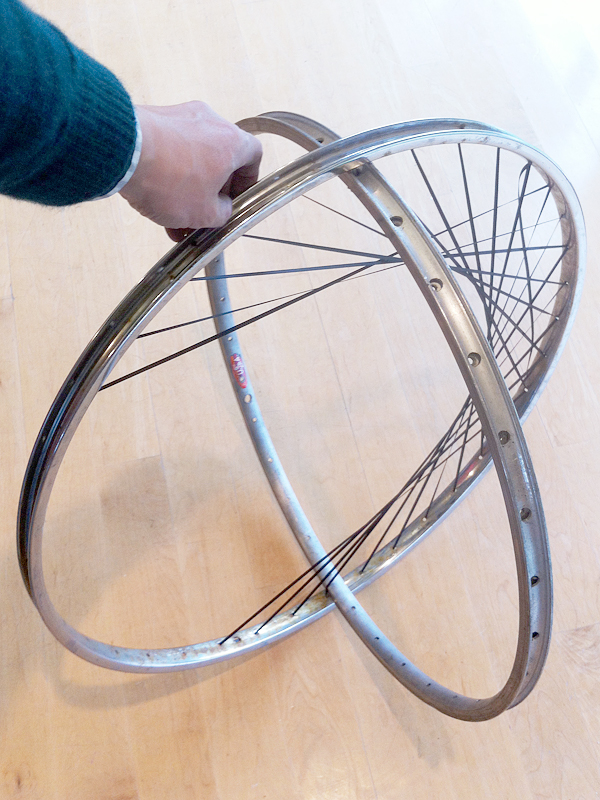
Find the largest holes in both rims. If the holes are too small for the lamp nipple to fit through, enlarge the holes with a drill. Start with a drill bit that’s just a little bigger than the hole. Increase the drill bit size gradually until the hole is big enough for the lamp nipple.
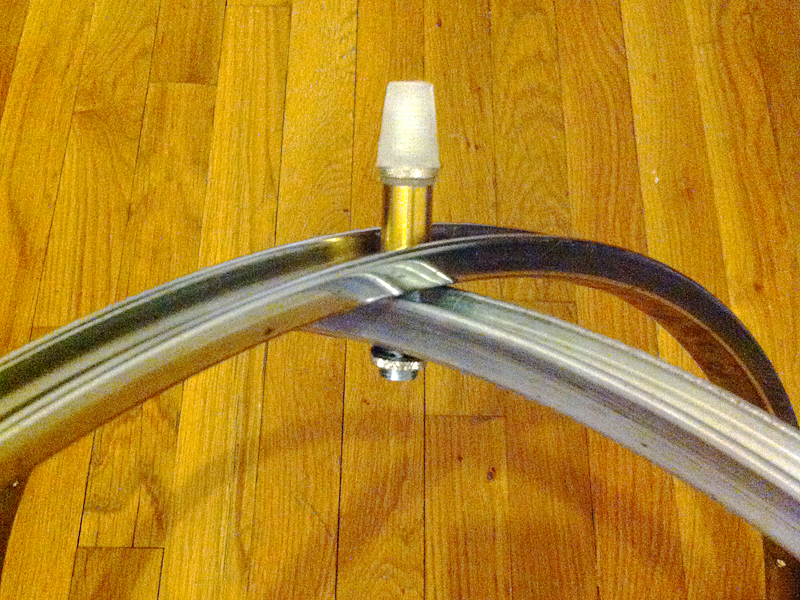
Screw the lamp nut on the lamp nipple. Slip the lock washer onto the lamp nipple on top of the lamp nut. Align the two largest holes in the bicycle rims. Insert the lamp nipple from the bottom through the top hole. Slip the second lock washer on the lamp nipple and then screw on the coupling. Finally screw the cord grip into the coupling. The bicycle rims are securely anchored together, and you’ve got a channel for your wiring. Now you’re ready to start stringing.
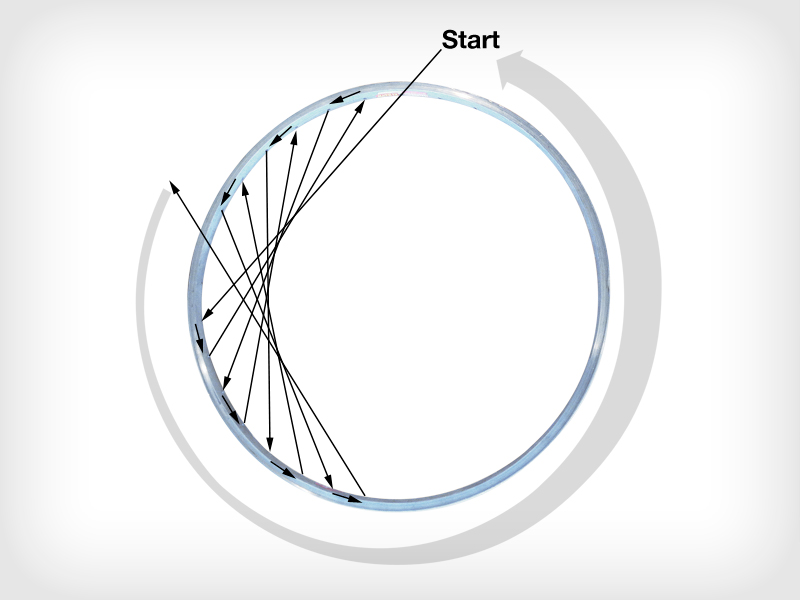
The pattern curve stitch wraps around the entire inner circumference of both bicycle rims. Each chord stretches the length of a little more than a quarter of the circumference. The closer the chord length is to the diameter of the rim, the wider the curve stitch pattern will be. Wrap the entire rim until you get back to the beginning. Tie the two ends together with an overhand knot. String the curve stitch on the second rim.
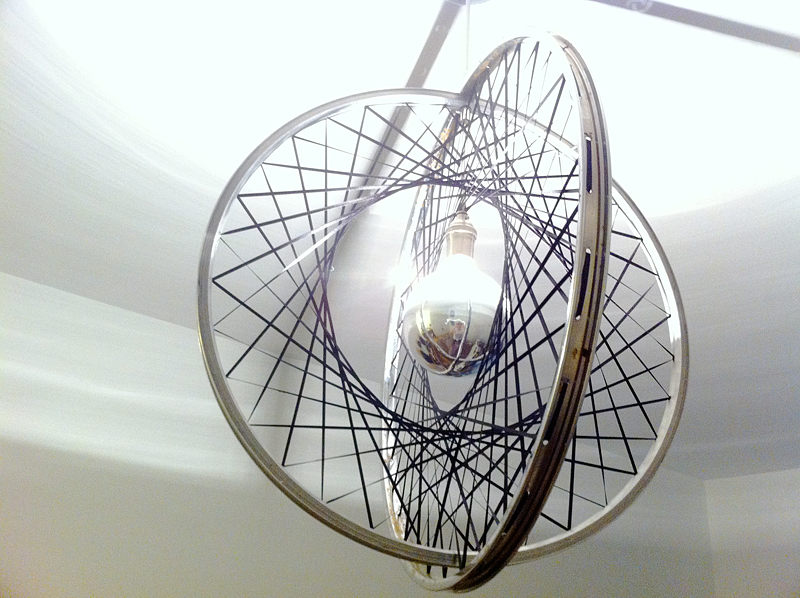
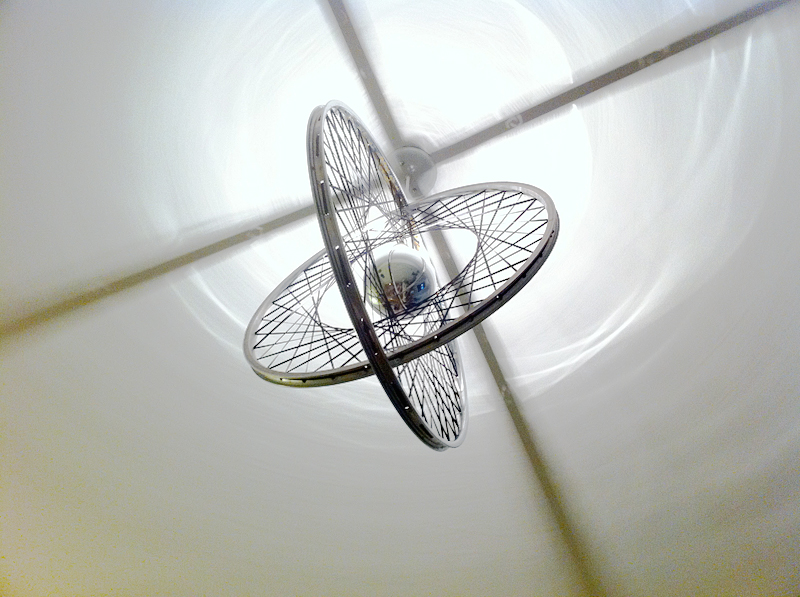
Since the pendant light isn’t covered in fabric, I finished it off with a silver bowl light bulb.
Thanks to Krrb for the invite, The Aldrich Contemporary Art Museum for hosting the workshop, and Andrew Wagner andJen Turner for originating such a cool upcycling project.
7 replies on “HOW TO make a bicycle rim pendant light”
[…] made from six-pack rings. And last week I came across another great stylish design, the ‘Boole‘ pendant light. This time Bao used bicycle rims and as you may know by now, another great […]
Hi,
Just thought I would share picture of my version of your cool design, I’m pretty happy how it turned out, I used 26_ inch wheels and 3 mm ribbon, and a funky light bulb.
http://instagram.com/p/ces99Cn4qQ/
Cheers
Now THAT looks AWESOME! I am frickin’ impressed! Major Kudos! Thanks for stopping by and showing me, Ewen.
Hi. Great how-to. What size bike rims did you use? It looks like one is a little smaller than the other. Thanks!
Hi Mandy! Glad you liked the tutorial!
You are absolutely correct. One indeed is larger than the other. The larger one is about 24inches and the smaller is about 23inches.
Thanks for taking visiting and taking the time to write!
Hi, Love the design, looks realy good, i am going to try and make it, just one question, what type of ribbon or cord did you use for the ‘boole’ version.
cheers
Hi Ewen! I used 1/8″ or 3mm black polyester ribbon. Ribbon as wide as the diameter of the holes or small would be fine. Really any ribbon that can fit through the holes would work. Thanks so much from visiting and writing!