This is an optional technique you can use to make your macramé t-shirt throw. In the main tutorial I showed you how to tie an overhand knot in general terms. Tying an overhand knot with a higher finish will require much more attention to detail and take longer to tie. You’ll have decide what’s more important having consistent knots or tying knots more quickly. Just so you know, I used this technique for the throw I made for Nate Berkus.
- Take two t-shirt strands in one hand to create a double strand. Make sure the cleft sides are facing you.
- Wrap the working end the over the back of your hand.
- Bring it up over the palm of your hand.
- Cross over the standing end to create a loop. Make sure the cleft side of the double strand is on the outside of the entire length of the loop.
- Pull the working end through the loop.
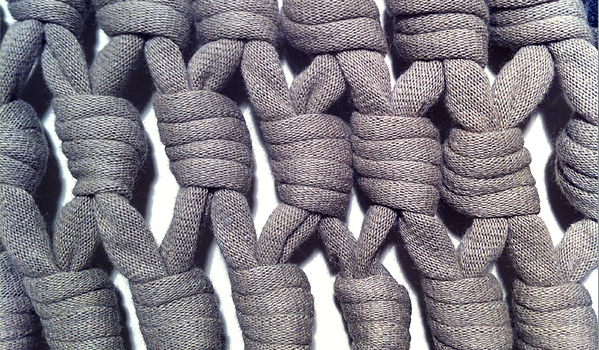
- Remove your hand and tighten the knot. The entire surface of the knot is cleft. When you’ve tied a number of knots you’ll notice on 0ne side of the throw the knots are triangular and point in the same direction. If you flip it over over you’ll see coils.
4 replies on “HOW TO tie overhand knots”
[…] relevedesign, […]
[…] vedremo come realizzare dei nodi di macram? facili con le strisce di tessuto sul sito di? relevedesign, in cui ci viene mostrato, in modo semplice e chiaro, come si possono fare dei nodi con le strisce […]
[…] Lo he visto en?relevedesign.com […]
[…] veremos c?mo hacer nudos de macram? f?ciles con tiras de tela de?relevedesign, en donde nos ense?an, de forma simple y clara, a anudar las tirelas para crear tejidos f?ciles […]