

I like to use fused plastic, because the material is easily available and versatile. I use it in quite a few of my projects.
I made a cardboard tray and lined it by fusing a plastic bag directly on the cardboard. I also made the handles for the tray by fusing plastic around a nylon cord. My junk mail and magazine vases have removable fused plastic linings. This lets me fill them with water for fresh flowers. I created plastic versions of my origami accessories with squares of fused plastic. These are great, because they’re more durable than the paper versions. I even use this technique to wrap gifts.
Fused plastic is waterproof, flexible, easy to work with, and a cinch to make. Let’s get started.
Supplies
- 1 plastic bag
- 1 pair scissors
- wax paper, parchment paper, or copy paper (Forego used copy paper. Ink from the paper may transfer onto your iron or the plastic. Use new copy paper. You can always print on the paper after your done using it to your fuse plastic. I’m going to use wax paper because it’s what I have in my kitchen at the moment.)
- 1 clothes iron
- 1 towel, ironing board
How-To
- First, cut off the bottom seam of the bag.
- Now cut off the handles.
- Flatten out the bag.
- If you’re using a towel, layout it out on your work surface. I prefer using towels, because I find it easier to fuse sheets of plastic on a larger surface.
- If the plastic bag has printed graphics, turn the bag inside out. This prevents the bag’s ink from transferring onto your waxed paper or iron and smudging everywhere.
- Lay a protective sheet of wax, parchment, or copy paper underneath the bag.
- Place second a sheet on top.
- Set the iron on polyester or rayon and turn of the steam.
- Iron the plastic bag, running the hot iron from the center outwards. This prevents air from getting trapped in the bag and forming bubbles. If you do find bubbles you can pop them with a pin and iron over them. Keep the iron moving at all times running over the entire surface two to three times. The plastic bag will smoothen and the protective sheet will adhere to the plastic bag. Be careful to run the iron over the protective sheet only and not directly on the plastic bag, otherwise you may melt the bag onto your work surface and your iron.
- Turn the plastic bag over while keeping it sandwiched between the protective sheets.
- Iron this side of the plastic bag.
- Allow the fused plastic to cool.
- Once it’s cool to the touch carefully peel off the protective sheets. If the plastic isn’t fused completely sandwich it between protective sheets and iron again.
- Now you have a two-ply sheet of fused plastic. You can make it thicker by ironing another plastic bag onto it. Remember to sandwich the plastic between protective paper before ironing!
Useful tips
- Keep the scraps from the bottom and handles. You can place them on top and fuse them with the main part of the plastic bag too, so there’s no need to throw anything in the trash.
- Ironing your plastic a little longer will cause it to melt and form holes. This can make for an interesting texture, but be careful not to burn it!
- You can fuse multiple bags together to make an even thicker and durable plastic sheet. Fuse additional plastic bags by stacking one on top and fusing it completely before stacking on another. If you try ironing together a stack that’s too thick, the iron may not be able to fuse the bags in the center of the stack
- Cut out shapes from different colored bags and fuse it on fused plastic sheet for like an appliqué effect.
- I made my plastic origami accessories using four-ply fused plastic. You can even go up to six or eight-ply.
- There will be minimal fumes, so keep the door to your work room open or crack open a window.
- Here’s a tip from talented crafter, Arely. You can use clear plastic bags to laminate paper. If you use a clear plastic bag, be careful because it tends to melt faster. After fusing, the plastic will still be clear, but it will have a matte finish.
- Becky, the plastic crafting maven of Crop Rotation, says sewing plastic is like sewing regular fabric, but can be a little more slippery. Use denim sewing machine needles and general purpose yarn or denim yarn.

This fused plastic was ironed a little longer, giving it an interesting holey texture. 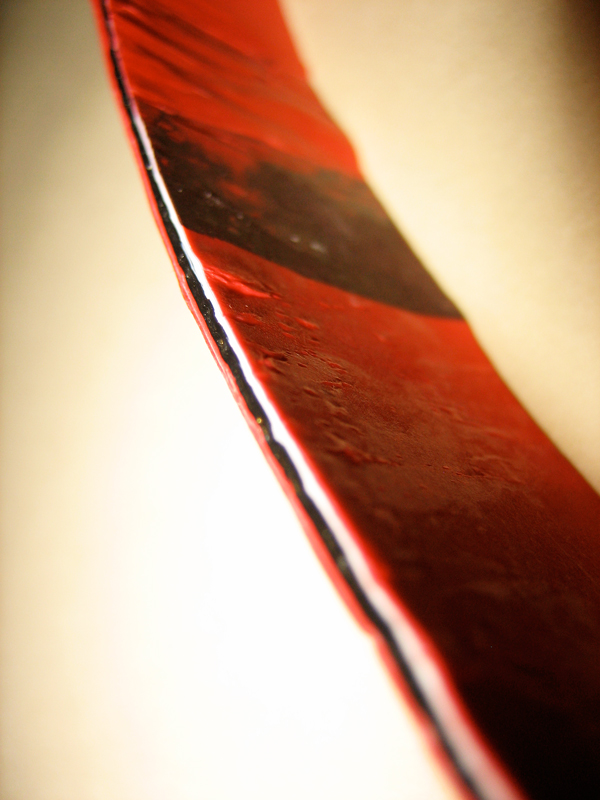
Fused plastic can be layered quite thick. This piece is about 1/4″ thick.
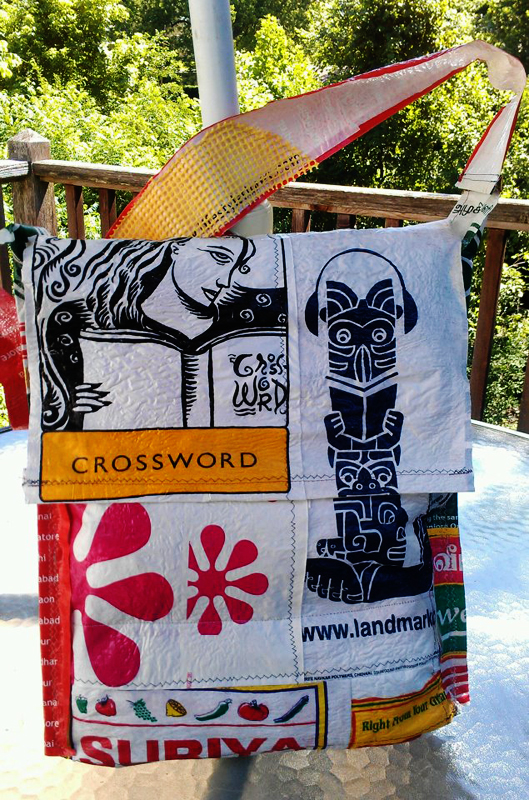
Becky, a college math professor with a crafty side, sent me a collection of Show & Tell projects. In her fused plastic projects, she uses rare bags, especially ones that friends or family bring back from other countries. She’s made a brilliantly graphic messenger bag and iPad sleeve by carefully composing a collage of prints. Check out more of her math influenced creations at Crop Rotation, and see what inspires her on her Pinterest.

56 replies on “HOW TO fuse plastic bags”
Hey Bao! I may be a little late to the party on this one, but just a shout to let you know that you are still reaching people and influencing crafting in 2020!
Also, I wanted to share a little from my experience that may help some with questions about seams. Once, I was making one of those giant water blobs for my son in my front yard. I was using a 4mil sheet of painters plastic, and no matter how hard I tried, my iron would not fuse the seams without rendering the wax paper impossible to remove (I was out of parchment). I scoured the house and tried about 15 combinations of heat sources and “non-sticky/melty” things. And finally – I stumbled on such a cool combo, that I’ll never look back!
I had recently relined some drawers with Contact Paper. I grabbed the backing from one strip, folded it in half, and used the crease as my guide line. An added bonus, the measuring squares printed on the paper backing made for a nice guide to keep my seam even. And then – hear me out I know it sounds crazy- I got my straightening iron (yep, the one for my hair) and went to work. I found that having the double sided heat made for a beautiful flat seam, the contact paper backing didn’t melt at all and quite literally fell right off the cooled plastic, and other than wanting a workspace, no ironing board or towel was needed. Oh, and for the curious, my flat iron was set to 360° (to compensate for thicker protective layer) and took 4-5 passes at a 1″/sec rate to fuse.
Happy Crafting!!
Jennifer, that is amazing! Reusing the contact paper backing is stroke of genius and using your flat iron is truly inspired. Thank you for sharing your brilliant discoveries. I’m sure it will help so many others.
Interesting idea. I may have to try it soon. Definitely adding it to my project list of thing craft things to learn (crocheting is on there currently).
I like this fused plastic idea, in part because I am certain there is nobody in my area that does this. With some trial and error, I might be able to make some neat stuff to sell.
I was wondering if there is a list some place of acceptable plastic to use. Clear plastic bags was mentioned… did you mean like sandwich bags? And can this idea be use with plastic containers? (I know there are DIY instruction to use plastic containers to make DIY Shrinky Dinks & other plastic projects in the oven.
Thank you!
Hi Dawn,
Plastic fusing is a useful technique for creating a new material or as a construction method (like I did in my retail gift wrapping post). Clear plastic sandwich bags won’t work with plastic fusing. It’s the crinkly plastic shopping bags that you want to fuse together. There are many different types of plastic and they don’t all melt the same way or at the same temperature, so it’s best to stick to one type per a process or technique. Thanks for visiting and taking the time to write. Good luck with your projects!
Hi ! What a great idea !! You guess what, now I can bring a cheap souvenir from EVERYWHERE I go only with my grocery bags… I knew that I could do something with those bags… Thanks a lot !!
However, a question for you Bao… How many times can we reuse the paper sheet ?
A French fan 🙂
HI Liz! That’s sounds like a great idea for plastic bags you get from shopping while on vacation! When I use waxed paper it starts to stick to the plastic after two to three fusings. If you use paper that goes into laser printers it is most likely not to stick at all. You can also try parchment paper. Thanks for taking the time to visit and write!
Hello. Would this technique work for making plastic bags smaller? I am not able to find the size I need and the bags I have are a couple of inches too wide. Thank you for your input.
Hi Kenzie. Fusing plastic bags won’t shrink them, but if you want to make a smaller bag from a larger bag, you just need to snip off excess and fuse the edges. I hope that’s what you’re asking. Thanks for taking the visit and write!
I would assume just cutting out the size you want and then fusing would work just fine. I’m also assuming using files to shave off the edges might work to trim the edges or using a Dremel with the appropriate bit would also work… if fusing individual pieces of a size you want (or shape!) has mildly crooked edges.
Hello! Have you ever tried this with hard crinkly plastic – like the bags in which individually wrapped candy are packaged? Thanks for the tutorial!
Hi Lena!
Oh, now THAT is a great question! The hard crinkly plastic used for individually wrapped candies is probably cellophane. This type of plastic won’t melt together very well, but it will tend to burn. Some cellophane food wrappers look like they are sealed by melting, but are actually sealed with a another substance called PVDC. You can still use it in your plastic bag fusion though! Just put them in between two plastic bag layers.
Thanks for visiting, taking the time to write, and thanks again for that great question!
One more thing: if I were to do this with garbage bags, how elastic would it be? What’s the best material to fuse for elasticity?
Wake!!!! You’ve got so many great questions! 😀
Garbage bags and those thick shiny shopping bags are a bit stretchier as they’re made of low-density polyethylene (LDPE). My plastic bags of choice are regular shopping bags which are made of high-density polyethylene (HDPE). They’re thin and crinkly. As you fuse more layers of plastic together the material will become thicker and more stiff. Neither plastic will be stretchy and springy like a rubber band or spandex, but the LDPE will definitely be more “elastic” than the HDPE.
If you’re looking to make your bag stretchy, consider making plarn (plastic yarn) and using it to crochet or knit a bag instead of fusing. You can reference my t-shirt yarn tutorial to get an idea of how to cut one continuous strand of plarn (http://www.relevedesign.com/how-to-cut-continuous-t-shirt-yarn/).
If you do stay with fusing and you go with LDPE, you can use a cooler setting on your iron. Try your silk setting to start. 😀
Thanks again for writing! I really appreciate!
Hey! Great article, I’m making a bag for my mom for Mother’s Day with this. A few questions though
My iron doesn’t have a polyester or rayon setting. It has Fragiles, Nylon, Silk, Wool and Cotton. Which of these is closest?
Asso how would I go about fusing two sheets together like a seam, as an alternative to sewing?
Hi Wake, Great questions.
Temperature settings for irons can be vastly different. You can try setting it to the middle of your dial which is silk. If that doesn’t fuse the plastic just set the dial higher to wool or cotton. Honestly, my iron hasn’t been heating up too well lately, so I set it all the way to the top setting of cotton. Make sure to keep the iron moving, otherwise you’ll end up with holey plastic rather than fused plastic!
To fuse to sheets together to create a seam without sewing is almost as easy as using tape. Just lay strips of plastic over the seam and iron them on to keep the seam together. You’ll need to fuse several reinforcing layers to make sure the seam is secure. I also recommend reinforcing both the wrong and right side. Here’s a diagram.
I hope that helps!
Thanks for visiting and thanks for taking the time to write!
I was wondering if you could quilt them to make an awning?
That’s a cool idea. Though I wonder if stitching patches together would create leaky holes. Perhaps you can fuse additional plastic over the stitching, or just use an iron for your entire project.
Thanks for visiting and taking the time to write, Debra!
Hello, Bao! It’s so cool to see that the plastic fusion questions and ideas keep rolling in! 🙂
I can’t thank you enough for sharing my passion with your fans. Just an update, I continue to make the fused plastic, but only with interesting bags with logos or bags given to me by friends & family from their international travels. I moved more into keeping an eye out for ready-to-sew upcycling materials like thicker plastic, coffee sacks and 2nd-hand sweaters (that I felt… oooooo! I’d love a chance to share that with your fans!). I’m happy to share my knowledge on those things or sell bolts or pieces of my materials — they’re goin’ like hotcakes on Listia (my new fave… like ebay, but the currency is in the form of CREDITS, not $. I LOVE IT!). More about these passions of mine on:
Instagram @MathSpice
Listia @MathSpice
Pinterest @MathSpice (I still have @RotatingMyCrops, but moving to MathSpice)
Thank you for letting me share!
Becky Schantz
Educational Consultant, Author
Jack’s Back Books, LLC
P.S. I’ve recently resigned from higher ed teaching to spend more time w/younger students and educators. This way, I’ll have more time for my children’s book series… 2 published, more written!?) and for classroom applications of math & science through upcycling and cooking. Love. IT!
[…] The first idea is based upon this concept: ??http://www.relevedesign.com/how-to-fuse-plastic-bags/?. […]
This is great, I can see a lot of possibilities! Wallets,bags, shower curtains, tiles…etc and you could ‘draw’ on the plastic using different colors of plastic bags! Only if we are not using reusable bags.
Does it produce toxic smell when ironing?
Good question!
The plastic does off-gas. Try to avoid completely melting it. Iron the plastic enough just to fuse it. If you want to make a thicker sheet of fused plastic, build up with single layers instead of trying fuse several layers at a time. You’ll be able to avoid overheating and melting top layers of plastic. And, of course, work in a well-ventilated space!
Thanks for visiting and taking the time to write and ask a great question, Olive. I can’t wait to see what you come up with!
I’ve been looking for a way to repair the wings on my old fairy dolls. Buying plastics is too expensive and don’t look as good, but this worked like a charm and it looks right out of the package! Thank you so much!
Now that’s clever! Fused plastic fairy wings?how cool is that?! Thanks for visiting and taking the time to share, Kenia!
Has anyone tried working with the reflective silver emergency blankets? I wanted to use them in a school related costume project, and thought they would be neat because you have a lot material to work with but I’m having trouble getting them to fuse (even on high heat). I’ve been using wax paper to iron through. Any ideas?
Hi Peter. An average household iron won’t get hot enough to melt mylar blankets. You’ll have to do it the old fashioned way and stitch them together. If you’re trying to make the mylar thicker try fusible interfacing. I’m not sure if it will stick to to the mylar to so you’ll have to experiment with a swatch. You can also try a spray adhesive to glue two mylar blankets together. But again I would experiment with a swatch to make sure it sticks and that the material doesn’t degrade. I hope that helps.
Thanks for visiting and taking the time to write! Good luck with the school project! Tell me how it goes!
Hi, is it possible to this with other types of plastic? Old plastic wrappers for example? thanks 🙂
It sure is. You’ll notice that different plastics feel different, and they will also melt differently. The candy wrappers I’ve seen are quite small and thin, so You won’t need to iron them very much to fuse. Experiment, give it a go, and tell me how it goes! I’d love to put your results in the tips section of the tutorial! Thanks for taking the time to writing, Abi!
Thanks Bao! I’m giving it a go today, I’ll let you know how it goes! 🙂
I’m excited to find out how it went!
I’m also interested about washing things. I was thinking about how fun it would be to make a quilt from the bags I’ve collected from around the world.
Is the fused plastic machine washable?? I want to use it as a liner for the fabric sandwich bags I’m making. I know I can hand wash, but just wondering if anyone has tried machine washing and what the outcome was?
[…] attendant, voici le tutorial, si jamais vous voulez essayer! C’est en anglais, mais avec la?vid?o, rien de plus facile […]
I was wondering if the wax paper can be reused over again after the first time? Your site is great. Thanks for all the tips and ideas. Great to see the positive reviews too
Hi Nancy! Of course you can reuse the was paper over and over again. I’ve since switched over to parchment paper though as it a bit stronger and can be reused even more times. Thanks for visiting and taking the time to write!
I looooove using unbleached parchment for fusing. And my rule of thumb is that the paper can be used over and over and over UNTIL it rips and/or discolors the plastic. I hate it when some rare plastic bag gets stained by parchment I was neglectful to not replace.
Another P.S.: While organizing all of my plastic bags over Labor Day weekend, I found I can now organize my bags by COUNTRIES! Huge thanks to friends from around and who travel the world!
Oh so many more questions… Its coming in phases because i am working on it as we sprwk 😛
Can you fuse plastic to fabric?
You can indeed fuse plastic to fabric. You are literally melting the plastic onto the cloth. I would experiment with small scraps first to make sure it’s the look you want and also to test the strength of the bond (certain materials like a flannel may be more difficult to fuse to). Really great question. Thanks for asking it!
I’m so glad to see the interest in this! I also wanted to remind the readers that you can fuse plastic to paper, too. I just finished (finally!) organizing all of my plastics and discovered some fusion I made last year with cereal box liner bags and bits of fusion scraps, cut outs from magazines, etc. Sprinkled between the layers of bag, it makes cute confetti “fabric”. I need to blog that!
P.S. Thank you so much for including my projects, Bao, as my blog gets a lot of traffic from YOUR readers. Yay!
Also when I remove my iron the plastic curls up, how to prevent that? Iron too hot? Too quick? Too much pressure or not enough of any of these?
That does happen, but if you let the sheet cool down it will often uncurl. Just spread it back out. As it cools it will flatten again. Another great question!
Why is my paper not coming off clean from the plastic? 🙁 help!!
I know what you mean! Some waxed papers don’t come off cleanly, which will make it difficult to iron on the next layer of plastic.
1. Let the plastic cool first, and then take extra care and patience when separating the waxed paper.
2. If you have some stubborn pieces of paper stuck on your plastic. Put a bit of water on it and rub it off with your finger. You can also lightly scrub it with a scour pad. If you don’t want to use water, lightly sand it with a fine sandpaper.
3. Finally, I highly suggest switching to another type of protective paper to iron with. Copy paper for laser printers are made to withstand of the copying process and can work well. Parchment paper is also a great material to iron with. Parchment paper is actually now my go to paper for fusing plastic.
Thanks, again for the great questions!
I’m kinda late chiming in with this but I had the same problem with my bag not coming off cleanly but then I realized it was too hot. I basically melted it all together when I did it. Move your iron around more quickly or turn down the heat a bit.
Wonderful tip, Dannee! (???)
Like you said, it’s important to move the iron around to fuse the plastic evenly. Afterwards, it’s crucial to let the fused plastic cool a bit first! If it’s too hot to touch it’s not ready. Sometimes I’m impatient, and I rip off the protective paper before the plastic has cooled down. OOPS!
Great video! Thanks for showing us. I’d heard about this, but was a bit leery since I use my iron for sewing and wasn’t sure how the plastic would affect it.
A few questions: If the plastic is turned inside out, how did the lady make the cool messenger bags (the print is obviously readable)? How did you fuse the bags ON TO the surface of the tray or cord for handles? (It doesn’t seem very workable with an iron.) And, finally, how many bags have you fused without trouble? I’m wondering how thick you can make the plastic.
Cynthia, to answer about the graphics, I actually do not turn the bag inside out. I have read about doing that, but I found that with proper coverage of parchment paper, a low iron and constant movement of the iron, graphics can be on the outside.
As for the thickness, this has taken some practice, too. Thin grocery bags need to be folded 8 layers thick, then the amount of folds reduces as the bags’ thickness. For example, Target shopping bags need to be only 4 layers thick for fusing.
Thanks for letting me chime in, Bao. I hope this answered some of your questions, Cynthia! :~)
Becky
Hey Becky, thanks for chiming in! Cynthia, Becky makes some really great points. Bags do come in different thicknesses, so you may have to experiment a bit if you intend to fused multiple layers all at once. To stay on the safe side, until you get a hang of it, fuse one or two at a time. You can fuse as many bag together as you want without trouble for a thicker ply. You can make even make a thicker plastic block if you want to. Just be PATIENT and add SINGLE layers on top of the fused plastic as it gets thicker.
To fuse onto the tray just place the bag directly on the cardboard and iron as usual. I fuse the plastic on the tray BEFORE putting the pieces together. As for the cord, wrap a piece of plastic around the cord. Place the cord between two pieces of parchment and iron the seam. You just need to close the seam. I’ll have all the details for you, when I can get the totorial up.
Thanks for visiting and taking the time to ask the great questions, Cynthia!
Like the idea, but it is something I don’t think I can do yet. New to crafting. Will probably try in the future.
Hi, JoAnn. It’s so great that you’re crafting! This a really easy technique that’s great to have in your repertoire and will open up so many possibilities. Did you have an questions? Perhaps we can help you get started! Thanks for visiting and writing!
I sew with fused plastic to make wallets, zippered pouches and aprons. I have not tried using the waxed paper idea. I have used a pressing cloth–cotton or drawing paper. Thicker plastic used in some food items is easier for me to work with. Thanks for the tut!
My new go to cover sheet for fusing plastic is parchment paper. I’ve used it more lately and it works really well. After I’m done with it I roll it back up so I can use it again. Thanks for visting and for writing, Janelle!
If I can chime in again, I hope everyone considers fusing with natural (unbleached) parchment! I buy it in bulk via Amazon.com about once per year. Great for cooking AND projects.
http://www.amazon.com/If-You-Care-Unbleached-Parchment/dp/B001IZIC8I
Becky
Awesome idea! Have you ever tried sewing with the fused plastic?
I haven’t done any sewing projects with fused plastic, but it’s definitely doable. Of course, there are tote bags made of fused plastic, and I’ve also seen some eccentric fashions out there too. Have you or are you planning on a doing a fused plastic sew project? 😀 Thanks for writing, Miranda!
I hope Miranda checks back into this tutorial now that you’ve included some of my plastic fusion sewing projects! Miranda, please check out my blog often… I am working on sewing lessons learned along the way. For starters, you will need some denim sewing machine needles. You can use general purpose yarn and/or denim yarn. Sewing plastic is like sewing regular fabric, but can be a little more slippery. Thanks again, Bao, for including my projects! 🙂
Becky
Those are really great tips, Becky! I’ll include them in the tips section, so they’re more prominent.