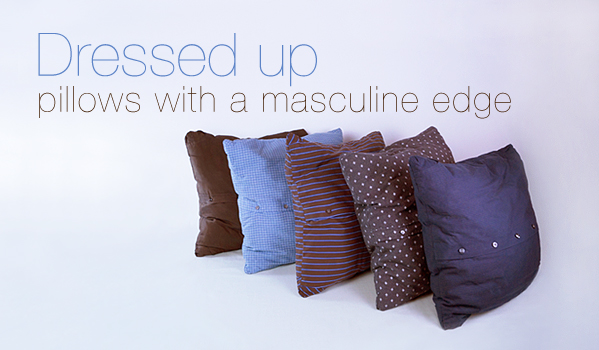

Here’s my first videoƒ tutorial! In it I show you a quick and super easy way to give your well-loved button-up shirt a second life as a comfy throw pillow. I hope you like it. Now go make some throw pillows!
Supplies
- dress shirt
- pillow or pillow insert
It should be slightly smaller than your shirt. - scissors
- pencil or chalk
- pins
- sewing machine or sewing needle
- thread
Instructions
- Button up shirt around your pillow
- Position your pillow on the shirt
- Mark up your shirt
- Pin your shirt and cut out the sham
- Sew all the open edges
- Finally, unpin, unbutton, stuff the sham, and rebutton the sham
Useful tips
- You can also use women’s blouses. Try large, bright prints and different fabrics that can complement your specific decor.
- Bey, an artist from Barcelona, says the button side of the pillow may be a little uncomfortable, but all you have to do is turn the pillow over. The buttons make it easy to change the cover whenever you want.
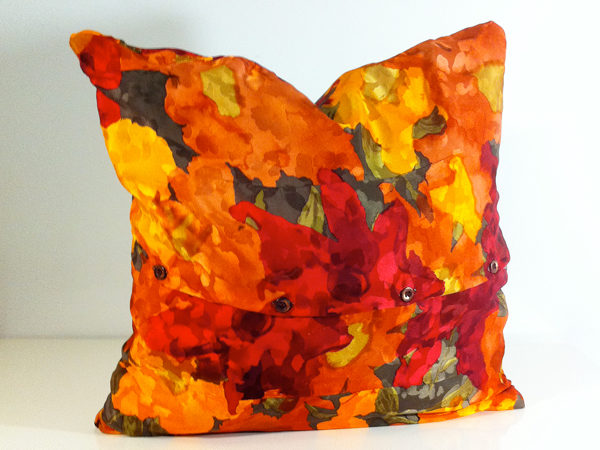
I made a colorful pillow from a woman’s silk blouse. 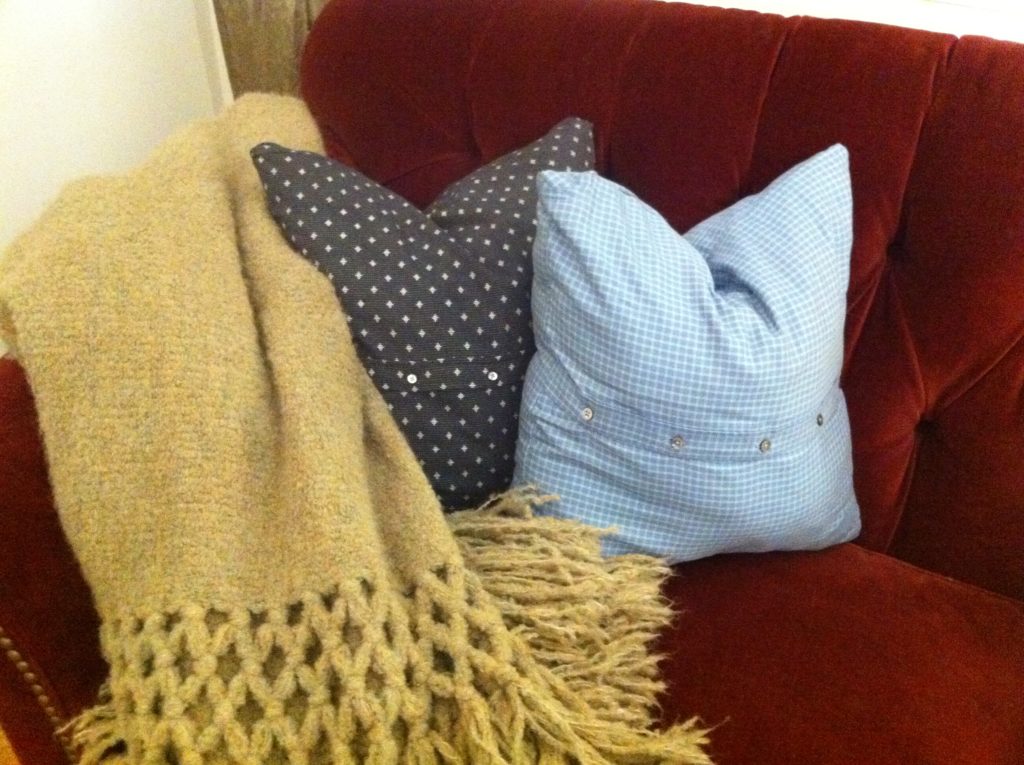
I snuggled two of my pillows together on the couch next to my Sefte throw. 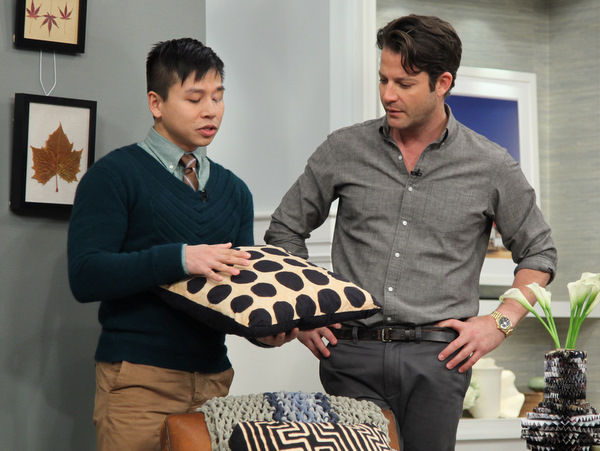
If you saw me one The Nate Berkus Show and you’re wondering how to make the patterns, sit tight. I’ll be posting a tutorial on design techniques you can use to come up with original patterns of your own, and show you how to render them on the pillows.
Check back for the tutorial.
A gingham shirt pillow made by Bey includes a charming patch. Photography via El Diario de Bey
Follow me on Twitter, Facebook, or Pinterest so you don’t miss the posts.
56 replies on “HOW TO dress shirt pillow sham in 6 easy steps”
[…] Dress Shirt Pillow Sham by Releve Designs […]
I want to give this a try but I’m interested is keeping the collar on any ideas on how to close the neck opening without compromising the shape of the pillow? Thanks!
That was one of the BEST demos I have watched online! Clear, concise, WELL-edited!! Excellent project.
Awww…thanks for visiting and watching, Leanna!
Thanxxx 4 dis amazing idea… i hav few waste shirts.. m going to try dis
I’m glad you think so, Mehak. Put those old shirts back to work. Have fun!
thanx so much for the idea. i will use my old shirts for these
Thanks for visiting and watching. Have fun!
[…] Cojines hechos de camisas por?relevedesign.com/ 2. Pajarita hecha de una viejo corbata por?makeit-loveit.com?/ 3. Bolsa de matr?cula […]
[…] Bao’s tutorial?can be found here! […]
I have been asked to make a pillow from a boy scout uniform. Any suggestions to be able to use part of sleeve badges as well.
Hi Lois. Those sleeve badge sure are cool! It certainly would be a waste not to use them. What if you remove the badges from the sleeves, and then sew them on the back of the shirt pillow? If leave the sleeves on and sew them shut, you’d have a shirt shaped shirt pillow. 😀
[…] Give your favourite old shirt a second life by creating one of these button up shirt pillows. […]
Thank you for such a wonderful memory making idea!! We just lost our dad to Parkinson’s disease. So these pillows will be a wonderful memory of him! Love you for sharing this idea! Jeanne
Hi Jeanne, I’m so sorry to hear about your dad. 🙁 I hope the pillows provide you and your family a little bit of comfort and help keep your wonderful memories of him close. Thanks for stopping by and sharing.
[…] | 4.Ruffle Pillow by Jess 5.Diy a patchwork lumbar pillow | 6.DIY Cat Silhouette Pillow Cases 7.HOW TO dress shirt pillow sham in 6 easy steps | 8.How to Make a Monster Pillow ? by Ashley Johnston 9.Tooth Fairy pillow | 10.Fancy sequin […]
[…] your old lampshade with a sweater in wool ?/ ?5.?Fabric Artichokes from Light Bulbs? / ?6. Dress shirt pillow sham in 6 easy steps ?/ ?7.?Lampshade makeover ?/ ?8.?Fringe Pillow ?/ ?9. Geometric heart cushion ?/ […]
[…] upcycling designer Bao-Khang Luu shares his step-by-step how-to for turning old men’s dress shirts into shams. Well-loved shirts get a second life when you use them to update your decor. Just make sure to use […]
Great use of old shirts wow
Thanks so much for the informative video! I recently bought some women’s linen dresses from a local charity and wanted to make them into pillows and wasn’t really sure how to go about it. Now that I have watched your video it will be super simple and I’ll be able to get more than one pillow per dress doing it your way!
Hi, Vickie! I’m so glad you like the video. It IS super simple, but if you have any questions don’t hesitate to send me a message. Have fun making all those pillows! Thanks for visiting and taking the time to write!
[…] couch and bed. But that is not possible. So I am learning to make my own. I came across this set of instructions for making pillows from men’s dress shirts?on relevedesign.com and I love it. Some thrift-store dress shirts and you can get a lot of […]
great idea!! thanks for the video!!
Hi Kellie! I’m so glad you like it. I hope the video inspired you to make some new pillow with old shirts. Thanks for stopping by to watch the video and say hello!
What a nice idea! I am all for the second life thing.
We’re on the same page! 😀 Thanks for, visiting and writing, Paula!
this is GENIUS! The video was great, thank you for sharing
I’m glad you like it, Julie! Thanks so much for visiting and taking the time to write! 😀
[…] Releve Designs […]
[…] my ultimate favorite repurposed item for your living room? A shirt pillow?sham. Use old, men’s shirts to make a cute throw pillow cover. There’s a useful […]
This is such a creative idea. I recently moved to the coast and my throw pillows do not match my new coastal decor. I’m heading to the goodwill to find some shirts in blues, tans and beige tones. Hopefully some stirpes too !! I may even try to use the sleeves to make ruffles for the back of the shirt for another look. Absolutely LOVE this idea, $2 for a brand new pillow, Amazing, Thank You again !!
I love coastal decor! Ruffles with the sleeves? Now that’s creative! If you don’t find stripes you can use white shirts and then painting stripes on them or find a blue shirt and use a bleach pen to make white stripes. 😀 I’m so excite about your new decor and your awesome pillows. Please send me pictures! Thanks for visiting and taking the time to write, LeDean.
Thank you for sharing this tutorial, I will try to make some.Thank you once again for sharing. Love your blog.
Hi Minerva, I’m so glad you like the tutorial. Thanks so much for visiting my blog and taking the time to write. I’m making some changes so I can put up post more regularly. Again, thanks so much for you support. I am truly truly grateful!
[…] Bao’s tutorial?can be found here! […]
Im going to use your designs ro design my new room
YAY! I’d love to see how it turns out!
What a great idea!! I have some shirts from my husband and I was thinking of making pillows but this is a much easier way because you use the buttons. Congratulations for the idea!
I’m so glad you like the project, Isabel. Thanks for visiting and taking the time to write! 😀
This is such a great idea!! Thank you very much for the instructions!
Going to try this out.
Greetings, Sonja.
great idea, thank you so much for sharing. Going to try this.
I’m glad you like it, Linda! I have plans for even easier shirt pillows, so stick around. Thanks for visiting, watching the video, and writing to me!
wow! I am so going to have a go at this. I just gave 5 bag fulls of my husbands’ old shirts to charity, now I have to try and repurpose some more…Thanks so much for sharing your great ideas.
Good for you! It’s always better to give to charity first. You help out a good cause, and you get a tax write off. I’m so glad you like the project. I hope you have fun with it when you get some more shirts! Thanks for visiting, watching the tutorial, and writing, Tehila!
Hah! I make these too! They are in my book Sew La Tea Do! I even made them on TV just like you! Snap! Great minds! We are twins! I like!
http://www.roadahead.com.au/homegarden/shirt-front-cushion-covers/
x
That’s wonderful! and CONGRATS on your book, Pip! I can’t wait to check it out. 😀
Thank you for this wonderful idea. I made each one of my neices a pillow from my brother’s shirts. We recently loss him and the pillows are a great comfort to each child when they need a “hug” from their Dad.
Your design idea is a pretty decor idea, but it’s a beautiful memory keeper too.
Hi Kirstin. Thank you for writing in. It’s so wonderful you were able to make such a thoughtful and meaningful gift. It’s truly touching. XOs to you and yours.
[…] un blog donde explicaba como reaprovechar camisas en cojines originales (lo pod?is ver si pinchais aqu?), me li? con las tijeras (David pobrecico me miraba con cara de… se ha chalao) y luego, y lo […]
Gracias por el enlace! La almohada se ve incre?ble. Me encanta el parche de su madre hizo.
I love this! Thank you for the great idea, and tutorial 🙂 I will have to try this soon.
Yay! Thanks, Jenn! I’m so glad you like it! Tell me how it goes! And thanks for visiting me and for writing too! XO 🙂
Congratulations on such an innovative idea. I am truly impressed by your unique skill set of having brilliant ideas and the ability to articulate those so completely so that we can get to the happy task of imitating your project. Truly appreciated.
Thanks, Peg! I’m so glad I can share my ideas with you!
You are so happy when you cut!
so cute!!!
love it!
I was happy!
I only had that one shirt to cut. There was no scene cut so I had to deliver the lines perfectly. Then I had to decide in my head if my delivery was good enough before I actually cut the shirt. It took like 500 takes!