
This is the second video in my origami accessories tutorial. In the first video, HOW TO make Sonobe units and octahedral origami accessories, I show you how to make a Sonobe unit and how to construct a twelve unit octahedron. Now, I’ll to show you how to make a thirty unit icosahedron. To complete this project you should know how to make a Sonobe unit. If you don’t, just watch the first half of the first video.
I’ll also be using fused plastic for this tutorial, which makes the origami a lot more durable. You can always stick with plain paper if you like. I highly recommend making one paper version before tackling a plastic. Check out my tutorial on “HOW TO fused plastic bags” to find out how to make your own fused plastic when you’re ready to take the plastic origami plunge!
Supplies
30 Sonobe units
all purpose glue or glue gun
How To make a 30 unit octahedron
- Make thirty Sonobe units. I made mine with fused plastic instead of paper (I’ll include a link to a fused plastic tutorial later!). So I’ll be using a glue gun to secure my pieces together. You can make yours with paper and all purpose glue. They work just as well.
- Construct the first ring of five pyramids. Grab a Sonobe unit. Notice it has a pocket. Grab a second unit and insert the point in to the pocket of the first unit. It should fit snugly.
- Separate the pieces, and apply some glue to the underside of the second piece. If you’re using all-purpose glue for a paper icosahedron, apply a spare amount. If you’re using a glue gun with fused plastic, apply a spare amount and do so quickly to avoid melting and warping the plastic.
- Reinsert the point, and make sure the fit is secure.
- Take a third unit, and insert its point into the pocket of the second unit. Again, notice how the point fits snugly into the pocket.
- Remove the point, and sparingly apply some glue.
- Reinsert the point and make sure the fit is secure.
- Notice the pocket on the third unit. Take the point from the first unit, and insert it into the pocket.
- Remove the point, sparingly apply some glue, and reinsert the point. This forms the first pyramid. Notice there are three points sticking out from the base of the pyramid (base point). Each of these points has a pocket as well.
- Take another unit, and insert its point into the pocket of any base point. Remove, apply glue, and reinsert.
- Take another unit and insert its point into the pocket of the previous unit. If you’re using paper, continue the method of applying glue before inserting a point into a pocket.
- If you’re using plastic, I’m going to show you a different working method, which I’ll use for the remainder of the tutorial. With the point already inserted in pocket, bend the top piece back to expose the bottom piece.
- Now you can apply glue to the bottom piece.
- Release the top piece back down, and make sure the fit is secure.
- Take the base point and insert it into the pocket of the last unit.
- Turn the entire piece over.
- Flip the last unit back to expose the base point.
- Now you can apply glue to the base point.
- Release the last unit back down, and make sure the fit is secure. Turn the entire piece over again, and you’ll see you have you have a second pyramid.
- Repeat steps 10-19 two more times to create two more pyramids
- Making the fifth pyramid is slightly different. There are two base points right next to each other coming out from the first and last pyramids we made. Connect these to points together by inserting the point of one into the pocket of the other.
- Turn over the entire piece, flip open the pocket, and apply glue.
- Repeat steps 11-19 to finish the fifth pyramid. Now we have our first ring of five pyramids. It should look like a star if you lay it flat on the table. We have fifteen more pyramids to make.
- Construct the second ring of five pyramids. Each of the five pyramids has a base point. Repeat steps 11-19 with each base point. Once we’ve created the second ring of five pyramids we’ll be halfway done. It should look like a hexagon if you lay it flat on the table.
- Construct the third ring of five pyramids. Between each pyramid is a pair of points. Connect one pair together by inserting the point of one into the pocket of the other.
- Turn over the entire piece, flip open the pocket and apply glue.
- Repeat steps 11-19 to close the pyramid.
- Repeat steps 25-27 for the remaining pair of base point. It should be a bowl shape after the third ring is finished.
- Construct the fourth ring of five pyramids. Notice there are five base points again. We need to make a pyramid with each of these base points. Insert a new unit into a base point.
- Insert the adjacent base point into the pocket of this new unit.
- Repeat steps 29-30 until all the pieces are joined together. We’ll end up with one last series of base points. We just need to close up the pyramids, and we’ll be finished.
- Insert a base point into the pocket adjacent to it.
- Apply glue on the piece with the pocket first, because it’ll be difficult to apply glue from inside the ball. We’ll have to work quickly before the glue cools and avoid making contact between the glue and the base point until it’s in position. You don’t have to use glue if you find it difficult to close up the pyramid. At this point, the icosahedron should be sturdy enough to hold it’s own shape.
- Repeat steps 32-33 until all the base points have been inserted.
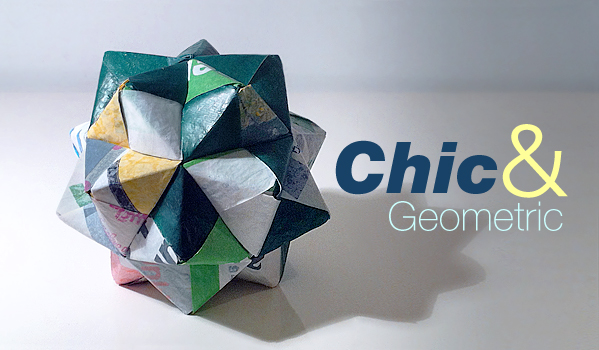
If you made the icosahedron with fused plastic, it will be durable and waterproof. Experiment with other materials to create a stylish menagerie of geometric coffee table decor.
Useful tips
If your origami is made of paper, brush on two coats of shellac to make it more durable. Use amber shellac to impart a warm earthy tone.
Stay tuned. I’ll be adding a tutorial on how to fuse plastic as well as how to make a giant sized version of the origami. I’ll show you how to make a 120 unit hecatonicosahedron that was on The Nate Berkus Show. While you’re waiting for the post of the bigger version, go ahead and make your 120 Sonobe units. That way you can hit the ground running, and you’ll just have to put the pieces together.
One reply on “HOW TO make medium-sized icosahedral origami accessories”
[…] like the text only version. Now I’m just waiting for the big-kahuna 120 unit version. ? His Video tutorial of the icosahedron is here in case you want to try for yourself. Share this:TwitterFacebookLike […]